Planting and Caring for Potatoes: A Complete Guide
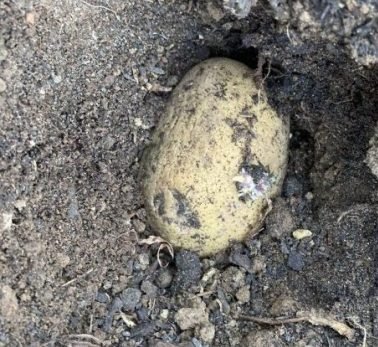
Potatoes are a versatile and nutritious vegetable that can be used in a variety of dishes. Whether you’re a seasoned gardener or just starting out, planting and caring for potatoes is a relatively simple process that can yield a bountiful harvest. In this article, we will provide a step-by-step guide on how to plant and care for potatoes, from selecting the right seed potatoes to harvesting your crop.
To begin, it’s important to choose the right type of potato for your growing conditions and intended use. There are hundreds of potato varieties to choose from, each with its own unique flavor, texture, and cooking properties.
Some popular varieties for home gardeners include Yukon Gold, Russet, and Red Pontiac, I have included some of the varieties I planted this year below. Once you’ve selected your seed potatoes, it’s time to prepare your planting area and get started on the planting process.
Potatoes can be planted as early as March or as late as May depending on the area of the country you live in. See your local planting dates for the best time to start your potatoes.
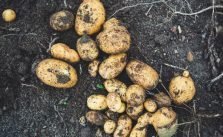
Each potato start can produce about 8-10 potatoes or 3-5 lbs of potatoes.
Preparing the Soil
Choosing the Right Location
Before planting potatoes, it’s essential to choose the right location. Potatoes grow best in loose, well-drained soil that is rich in organic matter. They also need plenty of sunlight, so choose an area that gets at least six hours of direct sunlight each day.
It’s also important to choose a location that is protected from strong winds. Strong winds can damage potato plants and make it difficult for them to grow properly. If possible, choose a location that is sheltered by trees, buildings, or other structures.
Preparing the Soil for Planting
Once you’ve chosen the right location, it’s time to prepare the soil for planting. The first step is to remove any weeds or debris from the area. This can be done by hand or with a hoe or rake.
Next, it’s important to loosen the soil to a depth of at least 8 inches. This can be done by using a garden fork or a rototiller. If the soil is compacted, it may be necessary to add some organic matter, such as compost, to help loosen it.
After the soil has been loosened, it’s time to add some fertilizer. Potatoes need a lot of nutrients to grow properly, so it’s important to add a balanced fertilizer that contains nitrogen, phosphorus, and potassium. A good rule of thumb is to add 4-6 pounds of fertilizer per 100 square feet of soil.
Finally, it’s important to create rows for planting. Rows should be spaced 2-3 feet apart, and each potato should be planted 12-15 inches apart within the row. This will give the plants plenty of room to grow and will make it easier to harvest the potatoes later on.
By following these steps, you can prepare the soil for planting potatoes and ensure that your plants have the best possible chance of growing and thriving.
Planting Potatoes
When it comes to planting potatoes, there are a few things to keep in mind to ensure a successful harvest. This section will cover choosing the right seed potatoes, cutting and curing seed potatoes, and planting seed potatoes.
Chitting potatoes before you plant allows the eyes on the potato to sprout, sprouts about 1/4 to 1/2 inch in length are ideal. You can chit potatoes by laying them out on a window sill that gets sunlight for 1-2 weeks before planting.
Choosing the Right Seed Potatoes
The first step in planting potatoes is selecting the right seed potatoes. It’s important to choose high-quality seed potatoes that are free from disease and damage. Look for certified seed potatoes, which have been inspected and approved by a state or national organization.
When selecting seed potatoes, choose those that are similar in size, as this will help ensure even growth. Avoid using potatoes from the grocery store, as these may be treated with chemicals to prevent sprouting.
After growing potatoes for the last 2 years I have come to the conclusion that my favorite potato to grow is Yellow Fin for size, production, and by far the best flavor and 2nd is Red Norland.
Varieties to Plant
Yellow Fin
Russet
Red Norland
Ruby Red
Cutting and Curing Seed Potatoes
Once you’ve selected your seed potatoes, it’s time to prepare them for planting. Start by cutting the seed potatoes into pieces that are about 1-2 inches in size. Each piece should have at least one “eye,” which is where the sprout will emerge.
You can also plant the potatoes without cutting them if they are not too large. It is alright if the chitted potatoes are a little soft since as the sprouts grow the actual potato will rot away.
I prefer to plant the whole potato to get the best crop.
After cutting, allow the seed potatoes to cure for a few days in a cool, dry place. This will help prevent rot and disease and allow the cut surfaces to callus over, which will help them heal more quickly.
Planting Seed Potatoes
When planting seed potatoes, it’s important to choose a sunny location with well-draining soil. Potatoes prefer slightly acidic soil with a pH between 5.0 and 7.0.
You can plant several crops of potatoes, I plant mine in the spring as soon as the soil is not too wet to work and again in August to get a crop in mid to late October here in zone 8b.
Dig a trench that is about 4-6 inches deep and place the seed potatoes in the trench, cut-side down, with about 12 inches of space between each piece. Cover the seed potatoes with soil, leaving about 2 inches of space between the soil surface and the top of the trench.
For smaller potatoes, you can plant them about 6 inches apart.
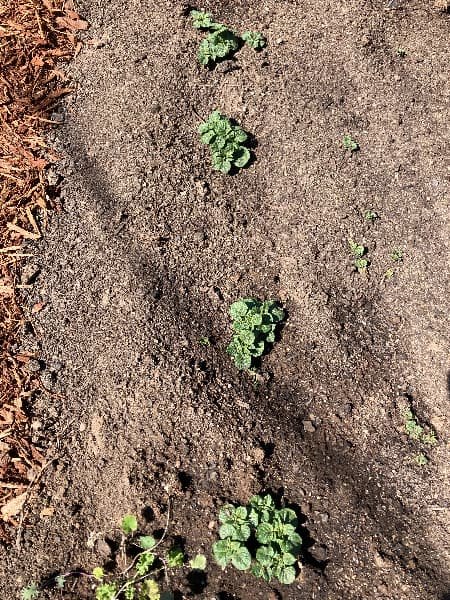
As the potato plants grow, gradually hill soil around the base of the plants to protect the developing tubers from sunlight and to encourage more tuber growth. Water the plants regularly, keeping the soil moist but not waterlogged.
By following these steps, you can successfully plant and grow your own potatoes.
Growing Potatoes in a Container

My father-in-law is trying to grow potatoes in a bucket, he put 2 potatoes in 1 5 gallon bucket and mounded up the soil until the plant grew over the top of the bucket.
I will update this article with the results of how many potatoes he harvests in the Fall.
Caring for Potato Plants
Growing potatoes is a rewarding experience, but it requires some effort to ensure a bountiful harvest. Proper care of potato plants includes watering, fertilizing, hilling, and controlling weeds and pests.
Watering Potato Plants
Potatoes need consistent moisture to thrive, but overwatering can lead to rot and disease. Water deeply once a week, or more often during hot, dry weather. Avoid watering during the hottest part of the day to prevent scorching the leaves. Mulching around the plants can help retain moisture and regulate soil temperature.
Fertilizing Potato Plants
Potatoes are heavy feeders and require regular fertilization to produce a good crop. Use a balanced fertilizer with equal parts nitrogen, phosphorus, and potassium. Apply fertilizer when planting, and again when the plants are 6-8 inches tall. Avoid over-fertilizing, which can lead to excessive foliage growth at the expense of tuber development.
Hilling Potato Plants
Hilling is the process of mounding soil around the base of potato plants as they grow. This helps to prevent tubers from turning green and bitter and also provides support for the growing plants. Begin hilling when the plants are 6-8 inches tall, and continue every few weeks until the plants reach maturity. Use a hoe or cultivator to gently mound soil around the base of the plants, being careful not to damage the stems.
When hilling the potatoes you can leave just the tops of the plants above the ground allowing photosynthesis to occur.
Controlling Weeds and Pests
Weeds and pests can quickly take over a potato patch if left unchecked. Hand-pull weeds regularly, or use a hoe or cultivator to remove them. Mulching around the plants can also help to suppress weed growth. Potato beetles and other pests can be controlled with insecticidal soap or neem oil, or by handpicking and removing them from the plants. Regular inspection and early intervention are key to preventing infestations from getting out of hand.
By following these simple steps, anyone can successfully grow and care for potato plants. With a little effort and attention, a bountiful harvest of delicious, nutritious potatoes is within reach.
Harvesting and Storing Potatoes
Knowing When to Harvest
Before harvesting potatoes, it’s important to know when they’re ready. Potatoes are typically ready to harvest when the leaves of the plant start to yellow and die back. This usually occurs about 2-3 weeks after the plants have flowered. Another way to tell if the potatoes are ready is to gently dig around the base of the plant with a garden fork and see if there are any potatoes present.
Harvesting Potatoes
When it’s time to harvest the potatoes, use a garden fork to gently lift the plants out of the ground. Be careful not to damage the potatoes as you do this. Once the plants are out of the ground, remove any excess soil from the potatoes and let them dry in the sun for a few hours. This will help to toughen up the skins and make them easier to store.
Curing and Storing Potatoes
After the potatoes have dried, they need to be cured before they can be stored. Curing involves keeping the potatoes in a cool, dark, and well-ventilated place for 2-3 weeks. This will help to toughen up the skins and heal any cuts or bruises that may have occurred during harvesting.
Once the potatoes have been cured, they can be stored in a cool, dark, and dry place. A temperature between 45-50°F (7-10°C) is ideal for storing potatoes. Avoid storing them in the refrigerator, as this can cause the potatoes to become sweet and discolored. It’s also important to store potatoes away from onions, as onions give off gases that can cause potatoes to sprout.
In summary, harvesting and storing potatoes involves knowing when to harvest, gently lifting the plants out of the ground, drying the potatoes in the sun, curing them for 2-3 weeks, and storing them in a cool, dark, and dry place. By following these steps, you can ensure that your potatoes stay fresh and delicious for months to come.
I hope this post on how to plant and care for potatoes was helpful for you to get started growing your own potatoes.
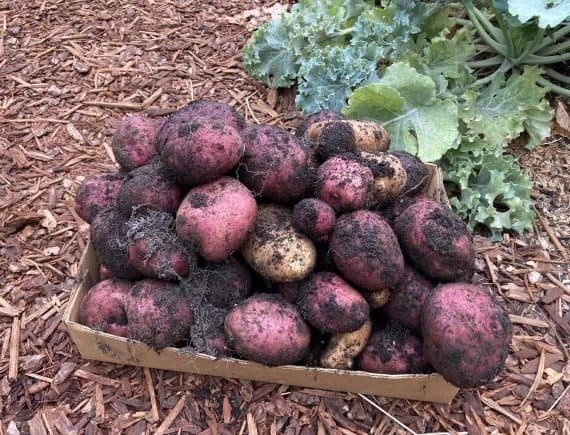
Here is my first harvest of potatoes for just a portion of the potato bed.
The pictures below were my 2nd, 3rd, and 4th harvests growing two varieties of Red Potatoes, a Russet variety, and my favorite variety Yellow Fin producing the largest crop and the best flavored potato.

